

Tips to Speed Seed Germination for Your Garden
If you’ve ever had seeds take forever to sprout you know just how frustrating it can be! The anticipation of reaping a harvest from our newly planted garden can make us so impatient. I’ve been gardening for a long time and I’ve found a number of tips to increase the speed and reliability of seed germination for your vegetable and flower garden.
One of the first things to consider is how long the seeds normally take to germinate and what temperature produces the quickest results. Different species of plant germinate best at different temperatures. Some species need light to germinate, or cold treatment while others can take several weeks, even under optimal conditions.

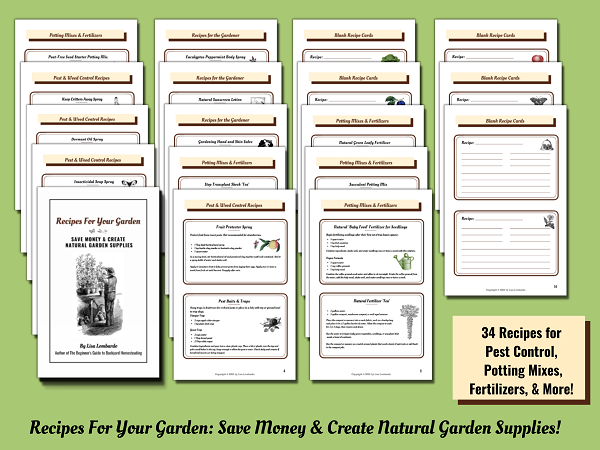
Check out my eBooks on Etsy!
‘Recipes for Your Garden: Save Money & Create Natural Garden Supplies’
’10 Simple Steps to Switch Your Garden to Organic’ eBook plus Planner & Workbook
So let’s take a look at some of the reasons that seeds might not germinate AT ALL:
- Seeds are too old to germinate
- Poor storage conditions caused seeds to deteriorate
- Seeds needed a pre-treatment before they can germinate
- Temperatures are too cold or too warm
- Seeds are too wet or too dry
- There isn’t enough light or there is too much light
- Seeds are planted too deep

10 Best Tips for Speeding Seed Germination
Here are some of the best ways to increase and speed up the germination of seeds for your garden. Keep in mind that you will need to know the best conditions for germination of each type of seed you plant. For example, some seeds need light to germinate, while others need dark conditions. Different seeds need different temperatures and some germinate best under controlled conditions indoors. Check the seed packet for instructions to sow seeds and how long to expect seeds to take to germinate.
So let’s take a look at 10 of the best tips for getting quick, reliable germination of your vegetable, herb, and flower seeds…
- Store seeds under optimal condition
- Use fresh packages of seeds
- Soak seeds overnight
- Start seeds indoors
- Place planted seeds on a seedling heat mat to germinate
- Scarify seeds that need this pre-treatment (nick or file the seed coat)
- Stratify seeds that need this pre-treatment (cold treat the seeds)
- Keep seed starting medium moist but not wet
- Plant in a cold frame to keep them warm
- Warm the soil with black plastic

Best Seed Storage for Increased Germination Rates
Most seeds will store for 1 or 2 years before their germination rates begin to decline however, they need proper storage conditions to keep them viable. A closed jar with a couple of silica gel packets is a good storage container because it will prevent your seeds from getting too much humidity, which can cause the seeds to begin to germinate but then die. Place the jar in your refrigerator to keep the seeds at a constant, cool temperature to increase storage length.
For more information on proper seed storage, check out my post on How to Make a Survival Seed Bank. You’ll also find information on which seeds keep for a few years and which ones should be used quickly for the best germination.
Use Fresh Packages of Seeds
Most of us gardeners are guilty of hoarding old packets of seeds. (Yes, I’m feeling a little sheepish, here!) Whether there were more seeds in the packet than you could use in one year or you ordered more seeds than you really have room to plant… it’s hard to throw them away, even if you’re not sure they’re any good.
However, if you really want the quickest, most reliable germination, it’s best to start with fresh seeds packed for the current season. To reduce waste and expense, only order as many seeds as you can use in one year. If you only need a partial package, try sharing with friends. If you wish to save leftover seeds for the following year, make sure you store them properly and use them up as quickly as possible. Try testing the germination rate (instructions included in the Survival Seed Bank post) and order a new packet if they don’t germinate well.
Soak Seeds Overnight Before Planting
Some seeds really do best if you soak them for a few hours or overnight before planting them. Beans, peas, and corn seed all like a warm soak to rehydrate and get them off to a good start. Just make sure you don’t leave them in water too long or they may begin to geminate and then rot in the overly wet conditions.
Other seeds don’t like to sit in water for very long or the seeds are so fine that it is difficult to handle them when they’re wet. Carrot seeds are very small and difficult to plant after soaking. So it’s best to plant these seeds in their bed or pot, then water them in well and keep them from drying out while they germinate.

Start Seeds Indoors
There are quite a few species of plants that do much better when started indoors under lights for the best germination and early growth. Tomatoes, peppers, eggplants, and Brussels sprouts are a few vegetables that like the consistent warmth, light, and moisture of an indoor seed starting set up. By planting these seeds indoors, we have much more control over the temperature and other conditions needed for the best germination.
On the other hand, some plants do much better when sown directly into the bed where they will grow. Root vegetables and sweet corn, as well as a few herbs, grow best when direct seeded into the garden. These plants don’t like to have their roots disturbed, as they are during the transplanting process. So keep this in mind when starting seeds indoors.

Speed Seedling Germination with a Seed Starting Heat Mat
Seedling heat mats are a great way to speed up germination, especially for heat-loving plants. A seedling heat mat, or germination mat, has 2 layers of plastic covering an electrical heating element. These mats plug into an outlet and raise the temperature of the soil in small seed starting pots to about 5 to 10 degrees Fahrenheit warmer than the surrounding air temperature.
In early spring or late winter, when many people are starting their spring seedlings, the temperatures in our homes tend to be a bit cooler than the optimal temperature for germination. I have 5 or 6 seedling heat mats for starting my seeds and they can slash a week or more off of the time to germinate.
Scarification of Seeds to Speed Germination
Some types of seed have a thick, tough seed coat that prevents the absorption of water, which is necessary for germination. Every seed needs to soak up water before the tiny embryo can begin the process of germination. Morning glory seeds and a few other species need to go through the process of ‘scarification,’ or having a small cut or abrasion created in the seed coat, which allows the seed to absorb water and germinate.
Most of our vegetable seeds do not need this type of germination pre-treatment but it’s a good idea to know about this for seeds with hard seed coats, such as some perennial, tree, and shrub seeds.
Cold Stratification of Seeds to Speed Germination
In some cases, seeds need to undergo a period of cold temperatures before they will germinate. Other seeds just germinate better in somewhat cool soil. Lettuce, arugula, and broccoli are some common vegetable plants that prefer to be planted in cooler temperatures. When the soil warms up too much, these crops may take longer to germinate and bolt much sooner if the temperatures are too high.
Many perennials, trees, and shrubs need to be planted in the fall and allowed to sit in cold soil over the winter before they will germinate properly. Asparagus seed is one example of a vegetable that germinates best after cold stratification.
(Some species need heat stratification because their natural habitat is susceptible to wildfires.)
Keep Soil Moist But Not Wet
Once you’ve planted your seeds in the garden bed or in little pots indoors, you must keep the soil or potting mix from drying out. If seeds dry out during the process of germination, they will die. They aren’t able to soak up enough water from deep within the soil to keep them alive because their tiny roots are just beginning to develop. So keep the soil moist, but not soaking wet, throughout the germination period.
Some good ways to keep the soil damp include covering the potting mix or soil with a clear plastic cover, such as the dome or lid that comes with a seed starting tray. You can also use some clear plastic wrap or a piece of cardboard to hold in the moisture. As soon as most of the seeds have germinated, remove the plastic wrap to reduce the chance of damping off disease (a fungus that kills seedlings).
Once the plastic cover has been removed, you’ll need to check your seedlings every day and maybe even more often than this, to keep them from drying out too much.
Plant Seeds in a Cold Frame to Keep Them Warm
To speed up the early germination of seeds planted directly into the garden, try sowing them in a cold frame. A cold frame is basically a box with a clear lid that can be lifted when the temperatures are warm, and lowered to protect seedlings when the temperatures are cold. This device allows you to plant seeds outdoors earlier than you are able to without this protection.
You’ll need to check the temperature in your cold frame during the day, especially when the sun is out, because the air can heat up to dangerously warm levels for tender little seedlings. Don’t forget to lower the lid in the evening to protect plants from cold night temperatures.
If you don’t have a cold frame, you can create one fairly easily with several bales of straw and some old windows. Check out my post about my Redneck Cold Frame for my instructions for this easy and inexpensive cold frame.
Warm the Soil With Black Plastic to Speed Germination
You can also prepare your garden beds for earlier planting by warming the soil up in early spring with a sheet of black plastic. Prepare the soil in your bed as soon as you can work it in the spring. Remove any weeds or debris, rake the seed bed, then lay a sheet of black plastic over the top and hold it in place with some rocks or boards. After a week or two of sunny days, the soil in that bed will be nice and warm… perfect for an early sowing of peas, kale, or spinach.
Sow your seeds in the warm soil, water well, and cover the bed with a row cover or low tunnel to protect the germinating seeds from cool temperatures. Keep in mind that this method will give you a jump start on germination, but don’t plant heat-loving crops too early or you’ll probably lose them to cold and have to start all over.

Get Your Garden Off to a Great Start This Year!
With just a few simple tips like these you can get your garden off to an earlier start this year. Keep in mind that many cool-season crops, such as lettuce, kale, collards, and cilantro will germinate as early as the soil temperatures warm up in the spring. You can also prepare their beds in the fall, plant the seeds just shortly before the snow flies, and get off to an early start first thing in spring.
When sowing heat-loving vegetables, be sure to give the newly planted seeds some gentle heat from a seedling heat mat to get off to a quick start indoors. Don’t transplant these tender seedlings outside until the night-time temperatures stay above 65 degrees Fahrenheit. Cold temperatures will set them back and delay the production of flowers and fruit… so it’s better to be safe than sorry!
What are your best tips for speeding up the germination of your seeds? Leave a comment!
As an Amazon affiliate, I earn a commission on qualifying purchases.

Your articles are always so helpful! Thanks for sharing with us at Simple Homestead Blog Hop. Stop by to see your article as one of the features at this week’s hop!
Melissa | Little Frugal Homestead
Great article!! Comes in handy just in time as I had some tomato seeds that haven’t germinated yet! Saw your post on the Homestead Blog Hop!
Happy to share, Abbagail! Best wishes with your tomato seedlings!
I’m so excited to get my garden started this year. Reading your gardening posts makes me even more anxious! 🙂
Happy Week!
Niky @ The House on Silverado
Hi Niky! Best wishes with your garden… I’m so glad my posts are getting you geared up for gardening season!
Serving This Week 3-8 to 3-12-2025 On Tuesday was BBQ Pulled Pork Nachos. Wednesday was Beef Brisket Hungarian Goulash. Thursday was Beer Marinated Italian Sausage. Friday was Broiled Orange Roughy. Enjoy!
Thank you for sharing, Marilyn!
Thanks for the info. I will be starting seeds indoor in about a month. Thanks for the party too.
Lisa,
I truly appreciate you hosting each week! I understand how much time it takes to do so!! Thank you!!
Stay safe, healthy and happy!!
Hugs,
Debbie