

Set Up an Easy Seed Starting Station
I recently spent an afternoon drooling over some expensive seed starting stations in a popular gardening catalog. The model I really liked featured 3 shelves and cost about $800. It’s hard to save money starting your own seedlings with that kind of expense. If you’ve ever wanted to create your own economical and easy to create seed starting station, keep reading!
For those who live in a northern area, like me, you’re probably already aware that many crops need a long growing season to produce a sizeable harvest. To get the most from your garden, you’ll either need to purchase seedlings or start your own a few weeks before your last spring frost. Although it’s entirely possible to start a few seeds in a sunny window, they will be ‘leggy’ compared to those started under lights.
To raise stocky seedlings you’ll want to start them in a greenhouse or under lights indoors. For many years I started my seedlings under shop lights and this works reasonably well, but I’m switching over to full spectrum LED grow lights because they produce stronger stockier seedlings.
This post contains affiliate links or advertisements.

Check out my eBooks on Etsy!
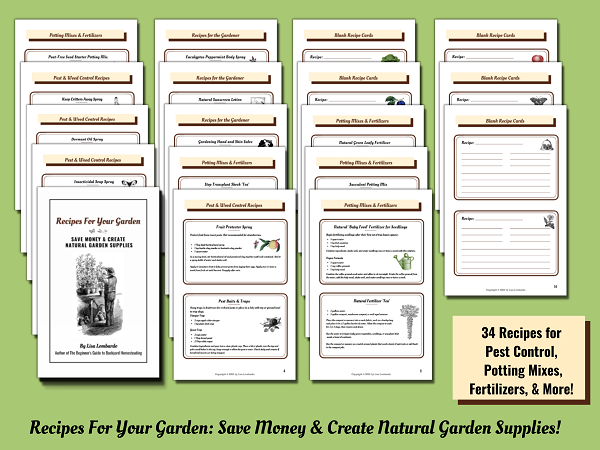
‘Recipes for Your Garden: Save Money & Create Natural Garden Supplies’
’10 Simple Steps to Switch Your Garden to Organic’ eBook plus Planner & Workbook

How to Set Up an Easy Seed Starting Station
Here’s how to set up a quick and easy seed starting station or a microgreen growing station in your own home. Allow yourself about an hour to assemble a shelving unit and hang the lights. If you need to build shelves, allow extra time.
Here’s What You’ll Need:
- Shelving unit
- Grow lights
- Extension cords
- Power strip
- Timer
You may be able to work around some of these items to save some cash or add others to customize your setup to fit your needs. For example, if you only need to start a few seedlings, a table or desk might be large enough. Consider using a desk lamp with an LED grow light bulb instead of investing in a seed starting station.

Optional Extras:
- Seedling heat mats
- White plastic or mylar sheets to reflect light onto seedlings
I’m using a plastic shelving unit, a mix of LED and fluorescent grow lights, several extension cords, a timer, and 2 power strips. I also have several seedling heat mats that get a lot of use. ( I even use them to keep chicks warm!)
Approximate Cost of Supplies:
- Plastic shelving unit - $45
- LED light strips, set of 6 - $60 (enough for one shelf)
- Shop light - $24 each (I’m using 2 for each shelf)
- Fluorescent bulbs - $10 each (need 2 for each shop light)
- Extension cords - $8 each (I’m using 5 cords)
- Power strip - $18
- Timer - $9
- Seedling heat mat - $15
Approximate Total Cost = $323
If you consider the cost of purchasing fluorescent bulbs for your stoplight every year or two, you can see that it is less expensive in the long run to start with LED grow lights. For one shelf I either spent $60 for the LED grow lights or I spent $48 for 2 shop light fixtures and $40 for the bulbs for a total of approximately $88 for each shelf of growing space. You could probably use one shop light per shelf, but you will either have leggy seedlings or you will start fewer seeds.
Cost of light fixtures needed to set up a growing space on each shelf of my plastic shelving unit:
- $60 for LED grow lights
- $88 for 2 shop lights and 4 fluorescent bulbs
The LED grow lights I purchased have a 2-year warranty and all six lights draw about the same amount of power as one shop light with fluorescent bulbs.
Step-by-Step Instructions for Setting Up This Seed Starting Station
- Assemble shelving unit (or mount shelves on a wall with brackets)
- Make sure the unit will accommodate your lights (shop lights are 4′ long)
- Attach lights to the bottom of the shelf above your growing space
- Plug light fixtures into an indoor/outdoor extension cord
- Plug cords into a power strip (if you will have multiple lights) and plug this into a timer
- Set lights to come on for 12 hours a day
- Use a seedling heat mat to speed germination
- Hang white plastic or mylar on the wall behind seedlings to reflect light back into the growing space
Tips and Safety Concerns
Before you set up your station and walk away, there are a few things to consider:
- Make sure all plants have trays to catch drainage water
- Don’t get electrical components wet
- Make sure light fixtures are hung securely
- Use a power strip with surge protection
- Check the stability of your shelving unit and keep children and pets from climbing on, or tipping it over
- Make sure pets and children can’t consume any plants that could be toxic (such as foxglove)
- Don’t put too much weight on shelves
As an Amazon affiliate, I earn a commission on qualifying purchases.

Save Money by Starting Your Own Seedlings
So you might be wondering how much money you can save by starting your own seeds. Purchasing veggie, herb, and flower seedlings can cost anywhere from $2 - $5 for a 6 pack of small plants to $5 - $6 for a pint-size heirloom vegetable plant. One packet of seeds may range from $2 to $5 for 10+ seeds, depending on the rarity of the variety and the company you purchase from.
Learn How to Start the Best Seedlings Indoors
I typically start 5 to 6 flats of seedlings every spring and it saves a lot of money to purchase packets of seeds and start them myself. But I still don’t want to splurge on an expensive (albeit very attractive) seed starting station when I can set one up for a fraction of the cost.
Learn How to Set Up a Seed Starting Calendar
If you want to get an idea of how much it will cost to set up a similar system, check out the cost of these supplies through Amazon (below) and compare them to the cost of purchasing from a local hardware store. Keep in mind that LED lights will last longer and use less power than fluorescent bulbs, so they are more economical in the long run instead of replacing bulbs every year or two.
Do you start your own seedlings each year? Here’s how to start eco-friendly seedlings!
As an Amazon affiliate, I earn a commission on qualifying purchases.

Check out this article on Calculating the Cost of Growing Your Own Food
Thank you for this information, I have been wanting to get a seed starting station up and running. Maybe next year!
I hope it goes well, Patricia! Thanks for stopping by!