Plant the Best Vegetable Garden
Planting a garden to grow your own vegetables is a great way to increase self-reliance, save money, and reduce household waste. Of course, you’ll want your hard work to pay off with an abundance of fresh food during the summer and maybe even some extras to preserve for winter. To plant the best vegetable garden for your needs, read through these instructions and tips gleaned from my 50+ years of gardening experience.
Start out right by choosing the best space for growing vegetables. Whether you have plenty of space to devote to growing food or you need to think outside the box, you’ll want to pick a sunny spot with good drainage that is easy to care for. Check out my article How to Choose the Best Garden Space for more information on what to look for in your new planting beds.
No space to plant a garden? Find out how to start a community garden!
Preparing the Soil for Your Best Vegetable Garden
Once you’ve decided where to locate a vegetable garden, you’ll need to prepare the soil for optimal plant health. Check the soil structure, pH, and drainage before you start planting. The best soil for a vegetable garden will have:
- A pH between 5.5 and 7.5 (somewhat acid to slightly alkaline)
- Loose, friable structure that allows water to drain at a rate of about 1″ per hour
- Plenty of organic matter to feed soil dwelling insects and beneficial microbes
If your soil is heavy clay, very sandy, or has a lot of rocks or gravel, it might be better to install raised beds filled with compost or try straw bale gardening rather than improving the existing soil. It certainly is possible to amend your soil for better plant growth however, it can be rather time-consuming.
How to Deal with Poor Soil:
- If pH is too acid, add lime according to the test kit instructions
- If pH is too alkaline, add sulfur according to the test kit instructions
- Improve drainage by double digging soil and amending with plenty of organic matter
- Improve water retention by amending with organic matter
- Sift through the soil to remove rocks for better root crop growth
- Keep adding compost!
To prepare your garden bed for planting, remove any weeds or turf grass from the bed and double dig the soil to loosen it up for your veggies. Work in ample amounts of compost unless you are planting crops that don’t require a good deal of fertility, such as root crops or legumes. Root crops will produce more top growth if the nitrogen levels are too high and legumes ‘fix’ their own nitrogen with the help of beneficial bacteria.
Quick and Easy Layered Garden Beds
If you’re in a hurry to get your new garden planted but don’t have a lot of cash to invest in raised beds, consider starting a layered mulch and compost garden, often called a lasagna garden. To create one, follow these steps:
- Cover the ground with newspaper or cardboard to kill the grass
- Alternate 3″ layers of brown organic matter with 1″ layers of green organic matter
- Top the bed with a 2″ to 4″ layer of compost or soil
- Plant your seeds or seedlings into the top layer of soil
A lasagna garden may need more frequent irrigation to prevent drying out since the layers will need to compost down a bit before plant roots can grow down into the ground beneath the bed. As the layers decompose, they will feed the beneficial microbes in your soil and create a slightly raised bed with improved drainage.
Choose the Best Vegetable Crops for Your Needs
Most beginning gardeners start out with a pretty good idea of what vegetables they wish to raise. One of the easiest mistakes to make is attempting to fit way more into your garden than you actually have room to grow. Here are some tips for choosing the best crops for your needs:
- Make a list of the vegetables and herbs you enjoy eating
- Determine which ones are most expensive or difficult to find in season
- Consider the expected yield of each crop and how much space it takes up
- Look up the ideal growing conditions for each vegetable or herb & compare them to your conditions
- Concentrate on raising the easiest crops to care for first and add other crops as you gain experience
Work through these steps for each crop that you wish to raise and determine which ones make sense for your gardening season and space, and which ones to try in the future after you’ve gained more experience.
Plan for pollinators by including herbs and flowers that attract honeybees, butterflies, and hummingbirds. Without these natural pollinators, many of our vegetable crops must be hand-pollinated to produce fruit.
How to Raise and Care For the Best Vegetable Crops
Now that you’ve picked the best spot for your garden, prepared the soil, and picked the best crops for your needs, it’s time to start planning and planting. As you work through these steps, consider using companion planting techniques to increase harvests.
Planning Your Vegetable Garden Layout
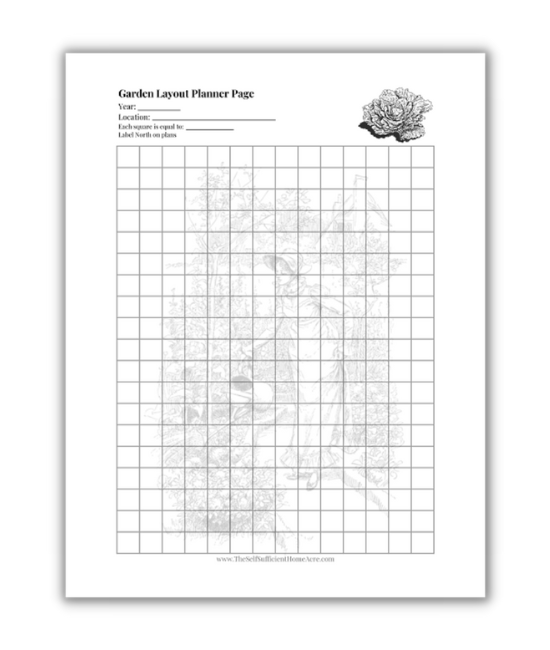
Before you start planting, you’ll need to plan the layout of your beds or rows and mark them in the garden. There are a variety of different layouts to consider, such as square foot, wide row, or single row plans.
Square foot gardens are laid out in a grid of 1′ x 1′ blocks that are planted intensively for increased yields. Larger crops may take up a 2′ x 2′ to 4′ x 4′ space, while smaller plants may be sown with 9 plants to each square. Consider the mature space each crop needs when laying out your garden. You may also incorporate bio-intensive methods by working in compost and planting successive crops.
Wide row gardens are usually planted with rows of 2′ to 5′ wide, depending on the mature size of each crop. A 2′ wide row of salad greens will make good use of your space and reduce the ground lost to paths when compared to a single row garden. Melons, squash, and pumpkins would need a row of at least 4′ to 5′ unless you choose bush varieties. To plant sweet corn or sunflowers in a wide row layout, plan on 4 single rows packed closely together with a walking path on either side of this bed. This will increase pollination and reduce the space needed.
Starting Seedlings and Direct Sowing
You’ll need to decide whether to direct sow seeds in your garden, start your own seedlings or purchase started plants. Purchasing seeds is the least expensive option but there are some good reasons to buy transplants instead. Here are some tips for deciding if you will direct seed, start seedlings, or purchase plants:
- Some crops should be sown directly into the garden because they don’t transplant well (root crops, for example) or they grow so quickly that there is no need to start them early
- Many crops need a long growing season and may not produce a crop unless started indoors early
- If you don’t have the time or space to start seedlings, purchase them instead
- Starting seedlings gives you a much broader choice of varieties and can save a lot of money
Learn how to start your own seedlings indoors under lights. Determine the best time to start your seedlings with this handy guide to setting up a seed starting calendar.
Planting Your Vegetable Garden
Once you’ve prepared the soil for your garden and purchased the seeds and seedlings, it’s time to start planting. Here are some tips for determining when and how to plant your veggies:
- Check the seed packet for info on direct sowing or starting indoors
- Some crops can be planted as soon as the soil can be worked in spring
- Other crops should be started indoors from 3 – 12 weeks before the average date of your last frost in spring
- Fast-growing greens may be planted every 2 or 3 weeks for successive harvests
- Peppers and eggplants should be planted after the temperatures stay above 60F to prevent stress
To find out the average date of your last frost in spring, check out this handy website.
As an Amazon affiliate, I earn a commission on qualifying purchases.
Hardening Off and Transplanting Vegetable Seedlings
Tender seedlings that are started indoors need a transition period to help them acclimate to outdoor conditions. This is called ‘hardening off’ and should take place over a week or two to prevent damage from bright sun, cold nights, and windy conditions. Here’s how to harden off your seedlings to keep them happy:
- Don’t move seedlings outdoors until the temperatures are warm enough for each specific crop
- Choose a spot that is protected from direct sun, wind, or cold air
- Move plants outside for about 15 minutes on the first day
- Increase the time seedlings stay outside each day by about 15 minutes
- Bring seedlings indoors until the nighttime temperatures remain warm enough
- Check them often to prevent scorching or drying out
- Transplant seedlings to your garden once they are acclimated and temperatures are warm enough
How to Transplant Seedlings
- Prepare the soil and amend as needed
- Water seedlings several hours before transplanting to reduce shock
- Plant seedlings on an overcast day so they won’t burn
- Dig the hole, place the seedling at the same level as it was planted in the pot
- Gently firm the soil around the seedling
- Water well and protect the plant from cold temps at night and full sun during the day
- Protect seedlings from cutworm damage with a cardboard collar or diatomaceous earth
- Check seedlings several times a day and water as needed
Tomato seedlings may be planted more deeply than they were in their pots because they grow roots along their stems. Plant them deeply after pinching off lower leaves and keep the newest growth above the soil level.
As an Amazon affiliate, I earn a commission on qualifying purchases.
Direct Sowing Vegetable and Herb Seeds in the Garden
- Follow the instructions on the seed packet for planting dates, depth to plant, spacing, and thinning
- Some seeds (beans and peas) germinate best after soaking or cold treatments
- Keep seedbeds moist until the seedling roots are established
- Protect warm season seedlings from cold snaps
- Remember to thin seedlings as instructed
- Side-dress seedlings with compost to retain moisture, reduce weeds, and fertilize
Watering, Mulching, Fertilizing and Weeding Your Vegetables
As your vegetables and herbs grow, you’ll need to water them during periods without enough rain. In general, a vegetable garden needs about 1″ of water per week to maintain growth and health. Here are some tips for the best irrigation practices:
- Water at the base of plants to avoid getting leaves wet and causing fungal disease
- Consider using drip irrigation or a soaker hose to save water
- Always check the soil before watering to prevent waterlogging and root rot, especially in clay soil
- Keep in mind that sandy soils drain quickly and need more water
- Check crop needs and avoid uneven watering for crops such as tomatoes that may crack or develop blossom end rot
In areas where drought and heat cause water stress, consider planting your garden in a sunken bed and mulch heavily to prevent moisture loss.
As an Amazon affiliate, I earn a commission on qualifying purchases.
Keep the Garden Mulched and Weeded
Mulching is a great way to reduce irrigation needs and keep weeds from taking over your garden. However, in some areas, it’s an invitation for slugs, snails, and squash bugs that like to hide in the mulch. If you have problems with these pests, consider sprinkling the soil with diatomaceous earth or using non-toxic slug bait.
- Use cardboard, newspaper, or heavy applications of mulch in paths to reduce weeds
- Apply a light side dressing of compost around seedlings to reduce weed growth
- Mulch around larger crops or interplant with low-growing crops to crowd out weeds
- Pull weeds as soon as possible and don’t leave them to flower and sow seeds for future generations
Fertilize Your Garden Naturally… With Compost
Compost your kitchen scraps, garden debris, lawn clippings, and even chicken litter if you have a backyard flock. This biologically active and nutritionally rich resource is one of the best fertilizers for a vegetable garden. By working compost into your beds and side dressing plants during the growing season, you’ll significantly reduce the amount of fertilizer needed for good production.
Decomposing organic matter feeds the beneficial microbes, earthworms, and other organisms that help feed your garden plants. Many nutrients are present in the soil but plants aren’t able to absorb them through their roots without the help of microbes. So feed your garden plenty of compost to increase harvests.
Plan Your Best Vegetable Garden This Year!
Now that you have the basics for growing an amazing vegetable garden you can see that there is some work and planning involved but the rewards are undeniable. Harvesting plenty of fresh fruits, veggies, and herbs from your backyard is a wonderful feeling that you are sure to enjoy.
Here are some tips for raising your own veggies and herbs:
- Plant only the foods you enjoy eating
- Start out slow and add more plantings as you gain experience
- Get the whole family involved!
- Learn some easy food preservation techniques to save the extras
During the summer I don’t purchase any vegetables from the grocery store and I have plenty to freeze, can, dry, or pickle for the winter. I love getting up early so I can walk through the garden with a cup of coffee to see what’s ready to harvest. It gives me a chance to plan meals for my family for the day, listen to the birds sing, and maybe even munch on some fresh beans, basil, or cherry tomatoes.
Once you get in the swing of planning, planting, and caring for your veggies, you’ll enjoy walking outside to check on your garden, too!
As an Amazon affiliate, I earn a commission on qualifying purchases.








Spring can’t come soon enough!
Garden fever has hit, and your tips are very practical!
Thank you for sharing at the Homestead Blog Hop!
Laurie
This is what I featured 1-18 to 1-22-2021. On Tuesday was Chili Dog Pizza. Wednesday was a Crescent Veggie Pizza. Thursday was my Taco Pizza . And Friday was Chicken Club Pizza. Enjoy!
Lisa,
Thanks so much for hosting each week!! It is greatly appreciated!! Stay safe, healthy and happy!!
Hugs,
Debbie
Thanks for sharing, Debbie! I hope you are well, too!
Thank you, Lisa, for some great reminders of how to plant my best garden! I so appreciate the feature of my seed vialibity post & for your kind words! Have a beautiful week!
Thanks for sharing with us, Suzan! I hope you are doing well!