Make a Rustic Heart Ornament!
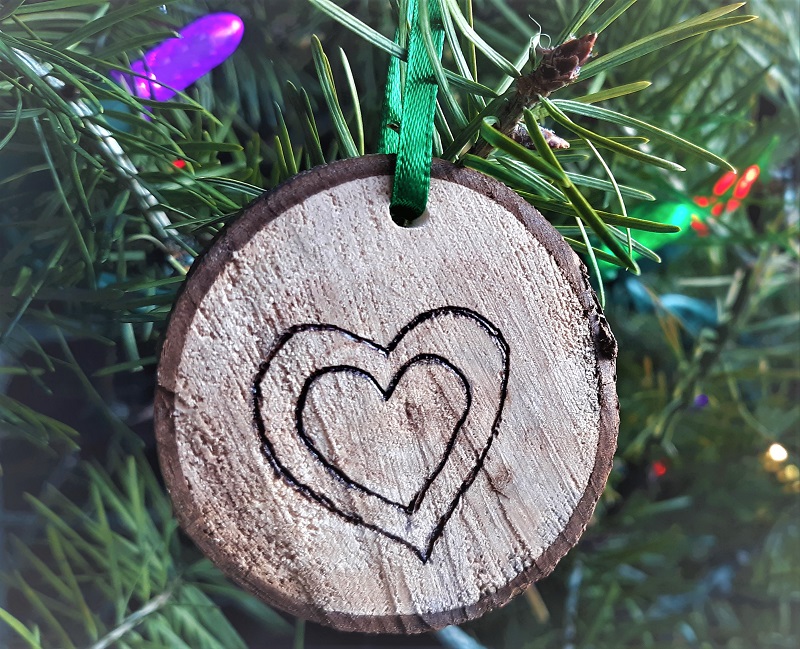
This rustic heart ornament is super simple and easy to make. If you have some sticks laying around, you can make it for just a few pennies! I wanted to create some inexpensive, fun ornaments for family and friends this year. This cute ornament was my solution. 🙂
How to Make Rustic Heart Ornaments
It doesn’t require a great deal of skill or time to create these ornaments. I would rate this as a beginner project for older children or adults.
Note: If you are working with children, you’ll need to help with sawing, drilling, and woodburning…or do those parts yourself. All of these activities can be dangerous for young children.
Materials You’ll Need to Make this Rustic Ornament
Here’s what you need to create your very own rustic heart ornaments:
- Sticks with a diameter of 2.5″ – 4″
- Crosscut hand saw or miter saw
- Drill
- Wood-burning tool or paint
- Ribbon
Start by selecting a dry branch or stick that has the proper diameter for your ornament. Green branches should be cured before using them.
(If you don’t have any branches to use, you can order pre-cut wood rounds or pick them up at the craft store.)
As an Amazon Associate, I earn from qualifying purchases.
Cutting and Drilling Your Wood Rounds
Use your crosscut or miter saw to remove the end of the branch if it is rough. Cut straight across the branch, using the 90 degree angle option on your miter saw if you are using one.
Then use the saw to cut a slice from the branch that is about 1/2″ – 1″ thick. It should look something like these slices, below. (Remember to make a straight cut across the branch, using the 90 degree angle option on your miter saw.)
My wood rounds are very rustic looking because I used a hand saw and the cuts are rather rough. If you have a power saw, you may create a much more even and smooth surface. This also makes it easier to do the woodburning.

Next, you will drill a small hole in each of the wood rounds to thread the ribbon through, for hanging the ornament. I used a 1/8″ drill bit for mine.
Creating Your Design
Now you are ready to sketch your design on the wood. I drew a double heart, but you can choose another design for your ornament. A star would be nice! Or if you are creating a gift for a gardener, you might choose a flower, butterfly, or lady bug design.

I used a wood-burning tool to make my design permanent, but you could also paint your ornament. If you are using a wood-burning kit, please read the safety instructions and follow them!
Painting is a better option for young children or if you don’t have a wood-burning tool. If you like, you could have your child make a fingerprint ‘heart’ by dipping their finger in non-toxic paint then making 2 fingerprints overlapping in a heart shape. This makes a great gift for grandparents! (I didn’t do this…my son is way past that.)

Finishing Touches for Your Rustic Heart Ornament
Once you have the design burned or painted on your ornament, you’re almost done! Allow the paint to dry before the next step.

Just thread a 5″ piece of 1/8″ ribbon through the drilled hole and tie a knot in the end!
I used green and red ribbon for my rustic heart ornaments, but you may choose another color for different holidays or to match the paint or packaging you’re using.
You could also paint the interior of the wood burned design if you like. Feel free to make this ornament your own with details such as a bow, the recipient’s name, or other decorations.

This Ornament Makes a Great Gift!
You can make these rustic heart ornaments for decorating your Christmas tree, use as a personalized gift tag, or decorate a mason jar mix, gardening gift, or use as a stocking stuffer!
Check out more fun ideas in posts Stenciled Christmas Decor & Christmas cards and free printable Christmas gift tags!
I made these ornaments for Christmas, but you could make them for other times of the year too. They would be super cute as a decoration for a birthday gift, for Valentine’s day, an Easter basket, or get creative and make garden markers or jewelry!
Making my own gifts for friends and family helps me save money and give them something that will remind them of me. 🙂
Can you think of other ideas for giving a rustic heart ornament? Leave a comment! I love to hear your ideas!
Are you new to wood burning? Check out this article…Wood Burning 101.


This is so pretty! We haven’t tried wood-burning yet but hope to give it a go this winter! Visiting from the farm fresh blog hop.
Thanks so much, Sarita! It was simple and easy to create these. 🙂